1. Log into your cPanel account.
2. In the "Mail" section, click on the "Autoresponder" Icon.
3. On the "Autoresponders" page, click on the "Add Autoresponder" Button.
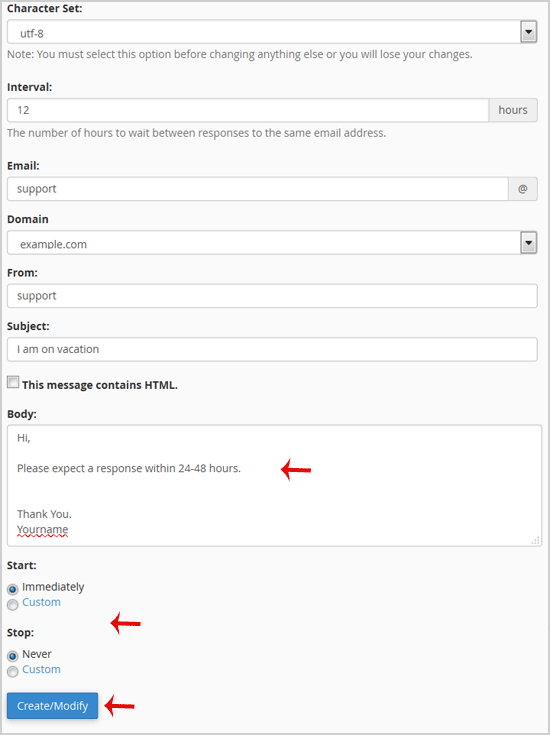
4. In the Interval field, specify the number of hours you wish the autoresponder to wait between responses to the same e-mail address.
5. In the Email field enter your email address on which you want to enable autoresponder. If you want to enable auto responder on support@example.com, enter "support" (without the quotes) in the e-mail field and should you have multiple domains, select the appropriate domain from the dropdown list.
6. In the From field, enter the name that the auto-response will be from.
7. In the subject field enter your e-mail subject like "I am on vacation", etc.
8. Select the start and stop time of your autoresponder.
9. Click on the Create/Modify Button.

How to remove Autoresponder?
1. Open Autoresponder.
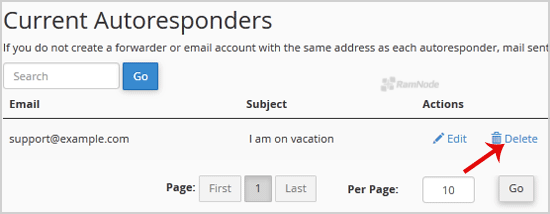
2. You should see your autoresponder email list under "Current Autoresponder".
3. Next to autoresponder, click on "Delete" Autoresponder.


